From Tradition to Wellness: Embracing Fermented Rice and Probiotic Goodness

Shared by Tejaswini, member of 48days of Holistic Living workshop

In the quest for optimal health and well-being, we often seek out natural remedies and ancient wisdom. One such remarkable discovery is the combination of fermented rice and probiotics, a dynamic duo that holds immense potential for enhancing our overall wellness. This captivating partnership offers a plethora of benefits that go beyond the ordinary, revitalizing our bodies from the inside out.

Fermented rice, a time-honored practice that dates back centuries, involves the fermentation of rice grains using beneficial bacteria or yeast cultures. This transformative process not only enhances the flavor and texture of rice but also generates a powerhouse of nutrients and gut-friendly microorganisms. Coupled with probiotics, which are live bacteria and yeasts that confer health benefits when consumed, fermented rice becomes an extraordinary source of nourishment for our bodies.

In this blog post, we embark on a journey into the world of fermented rice and probiotics, exploring the incredible benefits that await those who incorporate them into their lifestyles. From supporting digestive health and boosting immunity to improving nutrient absorption and promoting mental well-being, the advantages are truly awe-inspiring. So, join us as we unravel the secrets behind this exceptional fusion and unlock the door to a healthier and happier you. Get ready to witness the wonders of fermented rice and probiotics as we delve into their extraordinary benefits and how they can transform your well-being.

CHOOSING THE RIGHT RICE VARIETY FOR FERMENTATION

When it comes to fermenting rice, the choice of rice variety plays a crucial role in the overall outcome and nutritional value of the final product. While modern, commercially available rice varieties may be more widely accessible and easier to cultivate, there is a growing appreciation for the importance of using traditional native rice varieties in the fermentation process. These heirloom grains, often passed down through generations, carry a wealth of benefits that contribute to the overall quality and authenticity of fermented rice products.

  1. Rich Nutritional Profile: Traditional native rice varieties tend to have a more diverse and nutrient-dense composition compared to their modern counterparts. They often contain higher levels of essential minerals, vitamins, and antioxidants, which are not only beneficial for our overall health but also contribute to the flavor and complexity of fermented rice.
  2. Unique Flavors and Aromas: Native rice varieties have distinct flavors and aromas that are deeply rooted in their terroir. When fermented, these flavors and aromas are further enhanced, resulting in a more intricate and enjoyable sensory experience. By using traditional native rice varieties, we can preserve and celebrate the culinary heritage and regional diversity of fermented rice products.
  3. Preservation of Biodiversity: Embracing traditional native rice varieties in fermentation practices helps preserve the rich biodiversity of rice. Many native rice varieties are adapted to local environments, resistant to pests and diseases, and exhibit robust genetic diversity. By cultivating and utilizing these varieties, we contribute to the conservation of agricultural biodiversity and safeguard the genetic resources that are vital for future food security.
  4. Cultural Significance and Heritage: Traditional native rice varieties are deeply intertwined with the cultural identity and heritage of communities around the world. By using these varieties in fermentation, we honor and respect the knowledge, traditions, and farming practices passed down through generations. It allows us to connect with our roots, promote cultural diversity, and support the livelihoods of small-scale farmers who have preserved these rice varieties for centuries.
  5. Environmental Sustainability: Native rice varieties are often better adapted to local growing conditions and require less intensive cultivation practices. They typically have a higher resistance to pests and diseases, reducing the need for chemical inputs. By embracing traditional native rice varieties, we promote sustainable agriculture, minimize environmental impacts, and contribute to a more resilient and ecologically balanced food system.

Few suggestions for the native rice – Thanga Samba, Garudan Samba, Kaattuyanam, Kullakar, Mapillai Samba, Poongar,..

Check out the native rice varieties available in our parent-community-run-store –
HLP Store

IMPORTANT POINTS TO FOLLOW:

🥣 It’s always advisable to use any of the traditional native rice variety. Alternating the variety also helps to get the various nutrients from different types. Every native rice variety is very unique with different healing properties.

🥣 Start the fermentation process in the afternoon only.

🥣 Sign of good fermentation is the bubbling you would see in the corners/ top, which mostly not the case with just night fermentation.

🥣 Soaking, sprouting, fermentation, slow cooking are the key methods to follow from the traditional cooking methods.

🥣 SOAKING: 2- 6 hours depending on the rice variety.

🥣 The rice must be cooked in SLOW COOKING method only as it ensures the maximum nutrients retention.

🥣 DESTARCHING is the most essential step during this process. So do NOT skip this step

🥣 Adding the SALT previous night only enhances the bioavailability(optional)

🥣 A simple fermentation is good for the gut microbiome. Addition of spices enhances and gives different benefits.
Ex : Cumin – Gastric Issues
Fenugreek – Arthritis

🥣 Using earthen vessels for cooking and fermentation is advisable.

🥣 Avoid consuming fermented rice during cold, fever etc. Observe your body and the changes.

🥣 Always use freshly cooked(Same day cooked) rice for fermentation. Also do not use cooked rice stored in refrigerator for this.

🧉Sharing the slow cooking method I am following for TN boiled rice variety.

METHOD:

⿡Soak the rice for 4 hours

⿢For 1 glass of rice, you would need 7-8 glasses of water. First, bring the water to a rolling boil. Never put the rice & water together while cooking.

⿣Wash the soaked rice 2-3 times until the water runs clear. Do not discard the water. This is good for watering plants(either pour it as it is or you can ferment this water, dilute and use for plants).

⿤Add the rice into rolling boil water and immediately bring the flame to sim. Let the cooking happen in sim only throughout. It takes 25mins to 40 mins to cook depending on the variety of millets, boiled rice or brown rice it is.

⿥Once the rice is cooked enough, drain and de-starch. Place it back on flame for 4-5 min. Rice is done.

🧉Time taken for pressuring cooking – 10min
Pot/ Open cooking – 20 min
Slow cooking – 45 min.

⿦Once de-starching is done, let it cool down. Add fresh water again to the cooked rice until the rice is covered and keep it overnight.

⿧DO NOT COVER IT WITH A LID. We all generally cover it with lid. I did the same mistake for long time. Only recently after getting into bread baking , understood the significance of using natural wild yeast that’s available in abundance in the air.

So, the right way is to cover the vessel with a Muslin cloth that allows the natural yeast to aid in the fermentation process. Closing it with Lid delays the process and it’s not much beneficial too.

⿨As mentioned, the right sign of fermentation is the bubbles at the corner / surface. So next day morning, you can have this elixir with added spices(optional), or however you like it. You can also drink the water.

⿩Do not boil/warm the fermented rice again as it will kill the good bacteria in it.

BENEFITS:

When fermenting rice, various vitamins and minerals can be present in the final product, depending on the specific rice variety used and the fermentation process. While the exact nutrient content may vary, here are some vitamins and minerals commonly found in fermented rice:

  1. B Vitamins: Fermented rice can be a good source of B vitamins, including thiamine (vitamin B1), riboflavin (vitamin B2), niacin (vitamin B3), and folate (vitamin B9). B vitamins are essential for energy metabolism, nervous system function, and red blood cell production.
  2. Vitamin K: Fermented rice can provide vitamin K, a fat-soluble vitamin important for blood clotting and bone health. Vitamin K is also involved in regulating calcium and promoting heart health.
  3. Antioxidants: Fermentation can enhance the antioxidant content of rice. Antioxidants, such as phenolic compounds and flavonoids, help protect cells from oxidative stress and may have potential health benefits, including reducing inflammation and preventing chronic diseases.
  4. Minerals: Fermented rice may contain minerals like potassium, magnesium, phosphorus, and iron. These minerals play essential roles in various bodily functions, such as nerve function, muscle contraction, bone health, and oxygen transport.

Collective content shared by Yamini, Dr. Lakshmy & Archana.

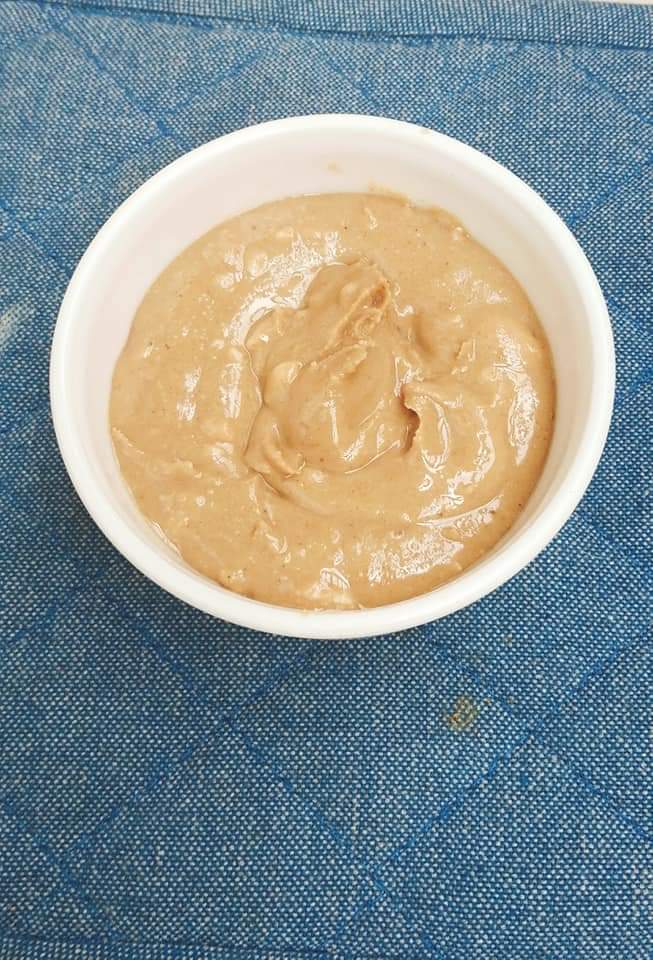
Homemade Peanut Butter

Do you know that we can make peanut butters at home easier than going to shop and buy, that too with zero added flavours, additives, artificial sweeteners or colors?

INGREDIENTS:

Peanut – 100gms
Jaggery – 1 tbsp
Salt – a pinch

METHOD:

Dry roast the peanuts well and allow it to cool completely. Then remove the skin.
Grind the peanuts in a mixer. Initially it will turn to a powder form, then slowly it will start forming lumps.
Give some rest in between and start grinding again. Make sure the jar doesn’t gets heated.
In max 5 – 10 mins the lump will change to a slight creamy texture. At this stage add salt, jaggery and grind for few more mins.
Now creamy peanut butter is ready. You can also add few roasted and slightly crushed peanuts to this to get a crunchy feel.

Note:
If you didn’t get the creamy texture, add very cold pressed groundnut or coconut oil and grind it. 1/4 tsp of oil would be good enough.

Shared by SaranyaHLP WORLD Community

Suleimani

The traditional spicy tea(black tea) which can be had post heavy meals to aid digestion or on those cold evenings once in a while. This is a Kerala style black tea infused with spices and lemon juice. Spices can be added as per our taste.

INGREDIENTS:

Water – 2 glasses
Ginger – Small piece, Washed, peeled and grated
Cardamom/Elaichi – 1 , crushed
Clove – 1 or 2
Palm candy/Country Sugar/Nattu sakkarai – according to taste
Tea leaves – a little
Lemon juice- according to your taste buds

METHOD:

Boil the water and add all other ingredients. Strain and add the lemon juice. Sip it hot!

Shared by SaranyaHLP WORLD Community

Kalyana Rasam

Who doesn’t love a warm spicy rasam on the cold days? The specialty of Kalyana Rasam is that it is mostly served in Thamizh Brahmin marriages. You can make this rasam along with the native rice to make it more merrier and healthier.

INGREDIENTS:

Tamarind – 1 small amla size
Tomato – 4 medium size
Toor Dal – 2 tbsps
Salt – as required
Curry Leaves
Hing– a pinch
Turmeric powder – 1/2 tsp
Coriander Leaves – chopped

Roast the following ingredients in a tsp of ghee and grind to a powder:
Coriander seeds- 2 tsp
Toor Dal– 2 tsps
Pepper– 1 tsp
Dried Red Chilly – 1
Cumin seeds – 1/2 tsp Add this directly while grinding the powder without roasting

To Temper:
Mustard seeds– 1 tsp
A2 Ghee – 1 tsp
Curry leaves
Crushed garlic– 3
Dried Red chilly broken – 1

METHOD:

Soak the tamarind in water and extract the juice.
Pressure cook the Toor dal and mash it well and keep it aside.
Chop one tomato into small pieces.
Make puree out of the remaining tomatoes.

Add the tamarind juice to a vessel along with chopped tomatoes, salt, curry leaves, turmeric powder, tomato puree and hing.
Mix well and keep it on stove top and allow it to boil well till the raw smell goes off.

Add dal and mix well. Now add required amount of water to adjust the consistency and boil for few more mins.
Finally add the ground powder and mix well and when the rasam starts to froth remove from flame.

Finally make a tempering using the items mentioned under to temper and add it to the rasam and garnish with chopped coriander leaf.

TIPS:

You can try rasams with Kokum Tamarind instead of regular tamarind.

Shared by SaranyaHLP WORLD Community

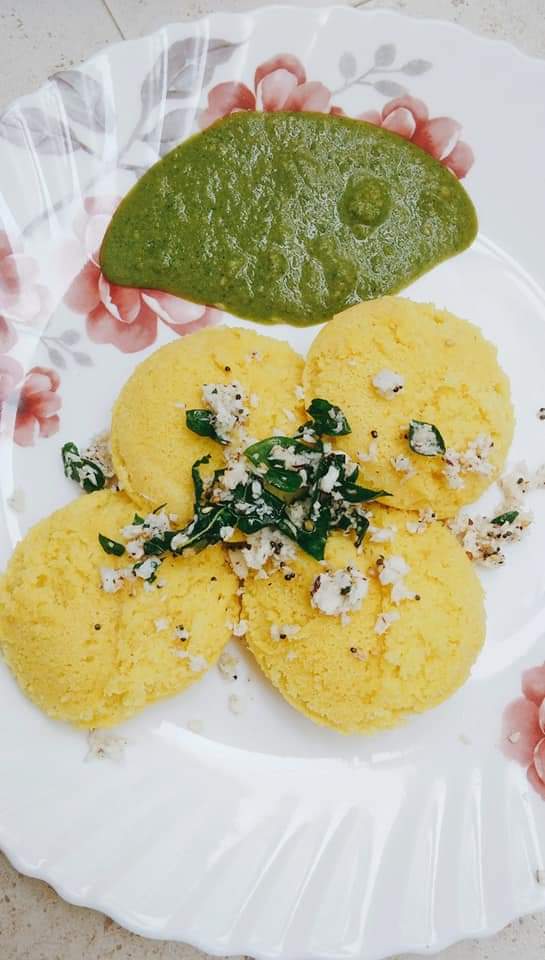
Dhokla with Mint Chutney

If you are searching for a healthy evening snack or a home kids party dish, this would the apt one for the little ones as well as the big kids – adults!

INGREDIENTS:

  • Any traditional cooking rice – 1/2 Cup
  • Chana Dal/Kadalai Parippu – 1 Cup
  • Lemon juice – half lemon squeezed
  • Hing – a pinch or two according to your taste
  • Jaggery powder – 1 -2 tsp
  • Salt – to taste
  • Turmeric powder – 1/2 tsp
  • Ginger + Green chilly paste (You can ground these 2 together and extract the juice too)
  • Mint leaves – washed and cleaned – 1/2 C
  • Coriander leaves – washed and cleaned – 1/2 C
  • Ginger – A small piece – 1/2 to 1 inch
  • Garlic – 2 cloves
  • Green chilly – according to your spice levels
  • Coconut – Grated – few spoons

METHOD:

Take cooking rice and Channa dal(kadalai parupu), wash it well and soak it for 6 hours. Then grind it to a smooth batter and allow it to ferment overnight, say 7 to 8 hours.

Before making dhokla, to the fermented batter add Lemon juice ,hing, jaggery powder, salt, turmeric powder, ginger green chilly paste (what I did is grounded these two extracted the juice and added that alone into the batter ). Mix everything well. Close this vessel and give a 10 mins resting time.

After 10 mins u can steam these and serve. Can be done in idly mould or Cake tin too. Grease the moulds well before pouring the batter.

After transferring the steamed dhoklas to the plate top it with a simple tadka (curry leaf mustard seeds sesame seeds and grated coconut) and serve it with mint chutney.

For the Mint Chutney, in a mixer grinder bowl take mint leaf, coriander leaf, ginger, garlic, green chilly, little grated coconut, salt and grind it to a smooth paste. Take this to a bowl add water and dilute if needed. Mix little juice and then serve.

Shared by SaranyaHLP WORLD Community

Moong Dal Idly with Hing Chutney

Idlies always makes a perfect healthy and quick breakfast during the rush morning hours. When you pair it with some amazing yummy chutneys it would be a jackpot for your taste buds!

INGREDIENTS FOR IDLY:

METHOD FOR PREPARING IDLIES:

  • Soak both dals separately overnight. Add Methi seeds in Urad dal.
  • The next day grind both separately and mix it together. Don’t add much water while grinding.
  • Allow it to ferment for 7 hours +/- according to your climate.
  • Before making idlies add salt, water if needed.
  • Add crushed pepper, Jeera and little hing
  • Mix everything well and make idlies.

INGREDIENTS FOR HING CHUTNEY:

  • Tomatoes -3
  • Red chilies- acc to your taste
  • Salt – TO taste
  • Hing

METHOD FOR HING CHUTNEY:

In a pan, add oil and add 3 chopped tomatoes, red chilies and salt. Sauté everything until mushy. First powder katti perungayam in mixer and then grind the Chutney along with the fried items and then finally make tadka..

It goes well with idly/dosa/paniyaram/curd rice.. hing gives relief from bloating and helps in good digestion.

Shared by SaranyaHLP WORLD Community

Millet Poha Mixture

The fun to make and munch homemade snacks is always special and mouth-watering. The aroma of each ingredients getting fried in our traditionally milled, flavoured oil cant described in words.

Lets proceed to the recipe now.

INGREDIENTS:

METHOD:

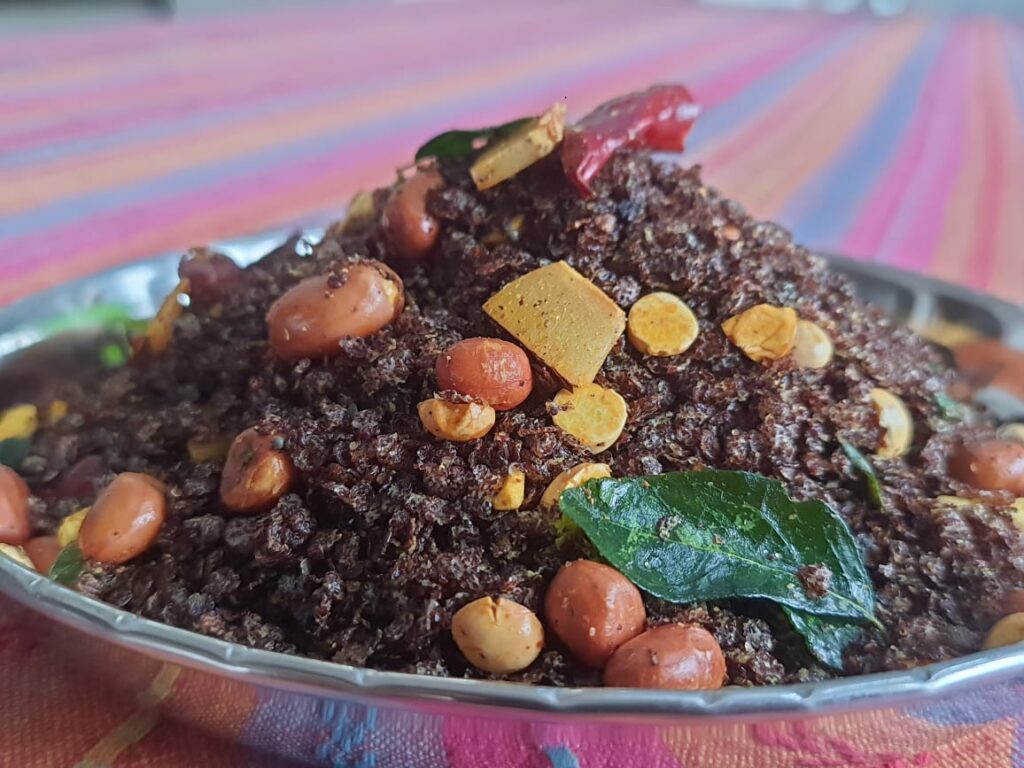
  • Dry roast all the ingredients like sesame seeds, flax seeds, dried red chillies, dried coconut and Hing.
  • In few tsps of oil/ghee, fry the Millet poha/flakes. Make sure you fry them on low heat.
  • Add few more tsps of oil and fry fennel seeds, green chillies, curry leaves, groundnuts and bengal gram separately.
  • In a bowl, mix everything well with dry spoon.
  • Store it in an airtight dry container.

Shared by NalinaHLP WORLD Community

Whole Black Urad Dal Laddoos

Healthify your snacks!

When I tried Homemade Sathu Maavu laddoos and shared with my friends and family, I got more requests, motivation and confidence to try other varieties of laddoos. No one cannot say no to these healthy laddoos right? 🙂

This time I tried with Unpolished Whole Urad Dal which I bought from the monthly grocery shopping from HLP Store. We all know how Black Urad helps all the women to strengthen their hip region. This is one of the best dishes for the young girls who are nearing / just attained / started puberty.

Also it can be considered as the ultimate post-workout laddoo for the health conscious people! It has the right amount of minerals, energy for your body!

Here is the recipe I followed for making these yummy and healthy laddoos.

INGREDIENTS:

METHOD:

  • In a pan, dry roast urad dal until it turns crispy, on a low flame without burning.
  • After it turns crispy, cool down and make fine powder in mixer along with jaggery powder & cardamom powder.
  • If you like the crunchy texture, coarsely grind the urad dal. For kids, it’s better to make it fine powder.
  • Add ghee and check the consistency. You should be able to hold the laddoo shape when you roll it with hands.
  • You can also coarsely grinded dry roasted cashews to get the nutty flavor or add the crushed ones.
  • Roll them into laddus and store them in an air tight container.

Shared by Hima Bindu, HLP WORLD Community

Healthy Sathumaavu Laddoos

We started using Sathu maavu at our home when my grandma was feeling weak and fatigued. At the same time my sister also delivered a baby, and she was in search for food items that can give her better strength & health.

As preparing of this mavvu/powder at home itself from scratch is time consuming process (sprouting, drying, roasting and powdering), my mom started to use a store-bought famous brand. But we were not satisfied as it increased our body weight.

So, we started to make our own powder at home, and it was super food for babies & adults. As days passed, we couldn’t prepare it due to daily workload, unavailability of people and arranging good quality ingredients.

After I joined HLP community, I understood the importance of avoiding 5 whites and wanted to replace milk at home. I was eagerly waiting for this product in HLP Store, as it is the one place, we could buy trusted products.

 I started to make kanji with this sattu mavvu. Sometimes I add ginger, jeera, onions, and fresh coriander leaves and it would be my first drink in the morning after having water on empty stomach. If you have 1 glass of this kanji, you will not feel hungry or fatigue until lunch. Unfortunately, my kids and husband are not very fond of this health mix.

But I wasn’t ready to compromise on their health. Being a mother, you need to learn tweaking healthy foods into whole family’s diet, understanding their taste buds and body needs too. I made laddoos out of it so that they can also enjoy Satthu as healthy snacks.

Heartful gratitude to HLP World Store for bringing this product for us. Hope all start to reap the benefits of this wonderful product.

Sharing the recipe, I followed for making the delicious laddoos. Hope you all try this and share the feedback.

INGREDIENTS:

METHOD:

  • Dry roast the Sathu Maavu Mix for 2-3 minutes in low flame. Make sure not to over-roast/burn it.
  • Transfer to mixing bowl and allow it to cool.
  • Chop the deseeded dates, coarsely grind the nuts, jaggery and ghee.
  • Add to the roasted powder and mix well.
  • Roll them into laddus and store them in an air tight container.

TIPS

  • If you use jaggery syrup, make sure you finish the dish in 15 days.
  • If you use dry jaggery powder, the shelf life is more.
  • Add a pinch of Himalayan salt to enhance sweet taste.
  • Adjust ghee as per your needs
  • You can add your own creative culinary ideas, like you can add  dry rose petals.

Shared by Hima Bindu, HLP WORLD Community

Paruthi Paal – Cotton Seed Milk

Recipe Card

A traditional refreshing drink from the land of Tamilnadu. This is referred to as a ” Triple Nutrient Drink” which is rich in protein, fat and fiber. Try this energy drink at your home and share your experiences

BENEFITS OF COTTON SEED MILK

  • Rich in Protein, fat and fiber
  • Best for cold and cough
  • Helps to regulate menstrual cycle
  • Best for breastfeeding moms
  • Heals stomach ulcer
  • Helps to prevent PCOS

Cotton seed milk and coconut milk are the main ingredients in this recipe. A portion of rice flour is added to smoothen the consistency (can use any traditional rice flour/miller flour). This is one of the best alternative for cow milk (vegan milk).